First of all, I just want to thank you for stopping by to see how things are coming along with my December Daily! And for the sweet comments and questions that have been left for me.
So, let's talk about how I you can use a digital kit to create what I have shared so far. Are you ready? It's really easy, I promise! The majority of the printed items I have used so far are from the Christmas Junque Background Kit found HERE.
How you ask? Well, you simply click on the file once you have unzipped it and the files will open up with Word, Photo Gallery or Photoshop Elements. If you simply click on the file your computer knows what software to use to open it. What I want to make clear for you is that you don't have to have any fancy software to open up these files. If you wanted to, you could take these files on a jump drive to your local office supply store and have them print out for you.
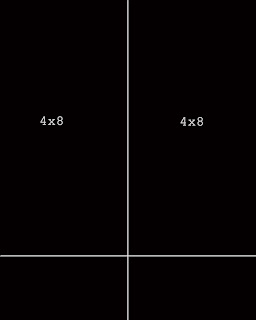
What I did was printed out a total of 13 background pages on 110lb white cardstock that I bought at my local office supply store. You could also use some Bazzill cardstock if you wanted some texture to the paper. I was able to trim out two 4"x8" pieces from each background page. If you look closely at the divided pages in this post HERE and look at divider for days 7 and 19. You will see that for some of these I cut the background pages horizontal on the page and on some I cut them vertical. This helps to give some of the duplicate pages I used a different look. I chose to add some colored cardstock to the back of the 4"x8" pieces to not only add some weight. Then I had a ton of fun pulling from lots of my existing stash to decorate the pages. As I mentioned before I wanted to keep it simple and easy! There were so many other things I could have done like sewing and cool pockets and cutouts but for me keeping it simple helped me get it done fast! I will add that if you used the Christmas Junque Art pieces found in the kit HERE you could print them out and simply cut them out and use them as embellishments! I'm telling ya, the possibilities are endless!
The layout above shows how I cut the pieces out on the horizontal, cutting them as shown above often allowed me to keep a design on each piece for those pages that had designs on top and bottom.
And the layout above shows you how I trimmed the paper on the vertical. Some background papers are better suited for this cut layout.I also printed out those background pieces at a reduced size so that I could cut out pieces with a smaller pattern.
And one more fun way to create divider pages is shown above. I simply printed out a background on some laser jet compatible transparency sheets also purchased at my office supply store.
It's so easy and fun to use digital files and if you have any other questions please let me know.
You can also go visit http://www.rhonnadesigns.blogspot.com/ and see some of her tutorials. Rhonna is fabulous at giving out free pointers!
It's so easy and fun to use digital files and if you have any other questions please let me know.
You can also go visit http://www.rhonnadesigns.blogspot.com/ and see some of her tutorials. Rhonna is fabulous at giving out free pointers!
Be sure to drop in later this week, I am finally going to share with you the foundation pages that I created with some of the digital elements in some of the other Christmas Junque kits. Ciao for now!
My other posts on December Daily can be found in the two consecutive posts below.


4 comments:
Thank you SO MUCH for blogging on my questions!!! You are awesome. I know it takes a lot of YOUR time to respond to those questions and I just want you to feel appreciated. Now I can't wait to purchase Rhonna Designs for my Christmas December Daily!
Great tutorial, Nancy! The book looks fabulous!
omg i love that transparency paper...gonna have to get me some of that! i just bought the backgrounds and the junque and can't wait to use them!!
thanks J. you really do make it look simple. (rhonna's done the heavy lifting, right?) ha ha. tfs!
Post a Comment