Tuesday, September 27, 2011

Halloween Decor Made Easy

Hi there and welcome to another round of Creative Team Tuesday using Rhonna Designs digital goodies! I had so much fun playing this past Saturday in my studio!  Here is what I came up with to decorate our mantel for this years Halloween season. As always, you can click on the photos to see them in a larger size.
Let's get the party started!

OK, here is the full shot of the fireplace sorry it's blurry!  That cute spiderweb is a placemat that I found at Pier1, as is the broom. The glittered candelabras are from Michael's (got them on sale for $2.99, yes!)  I created that banner, framed printable PDF using Spooky Junque. 

Lastly, I created that orange burlap garland by following the tutorial found HERE.  She used linen but I had this burlap on hand from last year and so used that and it help me omit having to punch holes.
I printed out some borders from this kit HERE to decorate the platform that the owl sits on.  Those eyeballs are from Michael's, fun huh!

The large print framed above is found HERE. I simply opened the file and printed it out, it was as easy as that!  It's a background print that I used as a print!


Here is a close up of the small frame, used one of the labels from the Spooky Junque Labels kit found HERE and then I cut out a small piece to add an extra touch to the outside of the frame.


The Spooky Junque Banner kit can be found HERE, it was so easy! I simply printed it out, inked the edges cut out some of the embellishments that came in the kit. I should mention that the banner on the far right has a piece from the Spooky Junque Labels kit.

Just a close up for you to see how I decorated a few of the banners. Used GlueDots to adhere many of the embellishments and to hold it onto the mantel as well!

Here is a small photo of the candy bar, this is the area that I hope the hubby and I can keep clear, ha!  I printed out the adorable freebie that Rhonna created found HERE.  I simply opened the file and printed it out in a 4x6 size add some crepe paper and added a small easel to the back.
To decorate the apothecary jars I printed out some of the Spooky Junque Labels from this kit HERE and attached them with some burlap. Love!

OK, this has been a long post huh!  Promise these are the last two photos!
This is also on the bar, just printed out some of the labels, cut them out and put them in the flower frog next to a pumpkin. Cute and easy!

And last but not least (and I lied it's two more photos, ha!)
This is the pre-Halloween candy station!  I was thinking when I created this, how cute would it be to have this somewhere that the kids could check daily or weekly to find a note & piece of candy as they countdown the days till Halloween!?  To create this I printed out the Candy Cones Kit found HERE, printed at a reduced size of 50%.  Then I printed out a background from this kit HERE and added some glossy accents to some of the flowers. You can sort of see them in the photo below. The candy cones are stapled onto the background paper then used a black frame I had on hand. For the frame embellisments, I punched out that shape from one of the banners that I had left over and the 31 I trimmed out of the labels kit and strip of spooky words came from one of the candy cones pages.

OK! That is it for now, sorry it was such a long post but I just wanted to share it all with you so that hopefully it will inspire you to take a chance with these digital printables!  Next week I will be back with some cards!  Thanks again for stopping by and be sure to visit Rhonna's blog on Tuesday, HERE for inspiration from some of the other Creative Team Members!

The Lettered Cottage

Wednesday, September 21, 2011

Quick and Easy Digital Scrapbook Layout

Just wanted to share with you a page I created of a visit we just had with my niece Alexa.  She is my sisters youngest and we enjoy her visits!  She and I had a great day with my mom, totally unplanned and I do believe those are often the best kind!  I used digital elements from Rhonna Designs as listed below.   I plan on printing this out on photo paper and slipping it into my Project Life album.  Which I might add, I am so behind on!  Decided that mine is not going to be a week to week account of this last year.  Instead I am just going to put photos in and journal, easy peasy!  Thanks for stopping in!

As usual you can click on it to see it in a larger size.


Supplies used are as follows
Found HERE
Found HERE

Found HERE  

 Lastly, the ledger paper background is from my old House of 3 stash called Fall Junque which sadly is no longer for sale.  But, I'm sure Rhonna will have some ledger background papers in her store soon.
(pretty please Rhonna) *wink

If you didn't stop in at Rhonna's Blog yesterday be sure you do!  It was Creative Team Tuesday and some of the girls have some great projects to share! Go HERE to see them!

Tuesday, September 13, 2011

A Girls Luncheon with help from Rhonna Designs

Hello friends! Wanted to share with you just a few photos from the luncheon that I hosted this past weekend.  We had a great time catching up, having some yummy food then spent some time creating a banner with the new Spooky Junque Banner kit found HERE

Remember this invite above and that cute mason jar I shared last week?  Well, let's get to that party now OK?
I wanted to share with you how easy and affordable it is to decorate a table with digital art! 
You can click on all the photos to view them in a larger size.

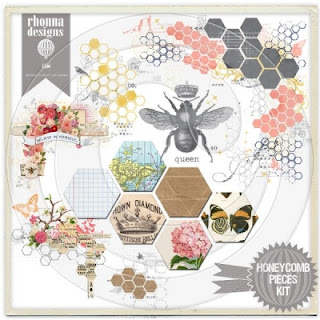
In the photo above you can see the table decorated with various items created with some of the Honeycomb designs.  Love them!  I created a paper table runner by using one of the digital pieces from the Honeycomb Pieces kit found HERE  I simply used Photoshop Elements to digitally stamp the image several times.  Then printed it out on a 110lb 8.5x11 card stock which I bought at Office Depot.  I then hand cut it out and laid them out on the table. If you don't use PSE not a problem, just print out one of the designs from the Honeycomb Backgrounds Kit found HERE and cut it out as I did.  Easy as that!

Another idea I had was to print that design out on an iron on transfer then transfer it to some linen I bought at my local Hobby Lobby.  BUT, there wasn't a coupon in the paper last week and I wanted to do this on a small budget so that will be for another day. (Yes, there is a coupon out now and so I will be sure to stop by HL and pickup that transfer paper, you should too.)

 
OK, here is another view of the place setting, here you can see that I created some Menu's.  I used PSE to create these but not to worry, if you don't use PSE then simply print out some of the honeycomb background pages found HERE. Then create your menu in any word processing program such as Microsoft Word then run the previously printed background page through the printer.


Here is a closeup of the pocket I created for the silverware.  I simply printed out one of the pages from the Honeycombs Background kit found HERE again.  I then cut the paper down to the size I needed, cut out a scrap piece of burlap and using my sewing machine did a simple stitch on three sides.  I then printed out one of the designs from the Honeycomb pieces kit and then punched it out using my favorite Stampin' Up punch.  I added my guests name, inked the edges with some Vintage photo ink, glued it down and called it done!

Flags anyone? It's all the rage to use cute small flags or pennants if you will on Straws and toothpicks and so here I created some of my own!  Once again I went back to the Honeycomb Background Kit found HERE and printed out a page of the yummy yellow honeycomb.  I then typed out some affirmations then ran the background paper through the printer a second time to print the affirmations on it.  I then trimmed out the pieces, folded them applied some glue and poof I was done!

Are you seeing a recurring trend here?  With one kit you can do so many things and you can use it over and over again!  Print them out at home or run them up to the local Office Depot.

How about some chair decor? Well, another easy idea for this too, went back to Honeycomb pieces kit found HERE and added some words to it.  Sent it to the printer, trimmed it down added some ink and hung it on some burlap.


Here is a terrible photo of the delish Ham & Swiss Sammies we had, you can find the recipe at my friend Kristen's blog Here .  I also made a Peach Dump cake for dessert and you can find that recipe on her blog Here.  And I included another shot of the table, that was a yummy simple salad :)

Thanks for stopping in and be sure to check back this week.  I started playing with the new Spooky Junque Banner Kit found Here and will be sharing what I have in the works. 
**Frames used on all photos above are from the Simple Photo Edges Kit found HERE

Head on over to Rhonna's Blog HERE for more ideas from other members of Rhonna's Creative Team.   

Sunday, September 11, 2011

Spooky Junque

Look at these yummy digital designs created by Rhonna! 
 I am SWOONING!!

I am in the middle of another project so as you can guess, I'm motivated to finish that one up!
I can't wait to start decorating my home with these goodies!  Here is my first creation for now, a fun announcement of the new line to share on my blog!

Head on over to Rhonna's shop HERE


Click on photo to see it in a larger size

Tuesday, September 6, 2011

Party Sneak Peek

Just wanted to show you a sneak peek of an invitation I created for an upcoming dinner party I plan to host.  I also decorated the mason jars both with some burlap and digital elements from this kit HERE which is shown below.  It's a mere $5 and can you just imagine all the party decor you could create with it!

Click on photo below to see in a larger size

I have a few other things up my sleeve so check back next Tuesday for a full reveal!
Have a great week and for my Texas neighbors I have everyone in my prayers! Hoping that no one is harmed by the awful fires we are experiencing! 

Saturday, September 3, 2011

Are You the Lucky Winner?

Hi there! 

First and foremost I want to THANK everyone who stopped in to wish me congrats!
I am so excited to play along with the others on Rhonna's Creative Team!  I feel so honored to have been chosen!  I hope that I can help give some inspiration to those of you who may have never used digital elements to create Hybrid projects.

It truly is easy and I hope to help some of you step outside of the box.  For now, here is the winner of the $25, I know you will have fun shopping over at Rhonna Designs!

click art below to see it in a larger size


Blogger tracy said...


Nancy, I am so excited for you! I can't wait to follow and see all the great things you'll do with Rhonna's beautiful work! What a great match!!

Hugs,
Tracy K.
August 31, 2011 9:04 AM

Tracy- email me with your email addy so that I can send you the code to redeem your prize! My email is listed on my sidebar.

Time to get to playing so that I can share the first of what I hope to be many projects using Rhonna Designs elements!  Hope you have a fabulous weekend!!

Thursday, September 1, 2011

Let the Fun Begin


Today is the day, the fun begins over at Rhonna Designs where you can shop HERE for some awesome kits!  What? You need some extra spending money to shop with? Well, Rhonna has graciously offered for each of her CT members to giveaway $25 to shop with.  

So, simply head on over to her FB Group page found HERE and "like" it and then leave me a comment on the post below found HERE for a chance to win.  Not a member of FB (insert gasp here)? Well, not to worry just let me know you follow her blog for your chance to win.

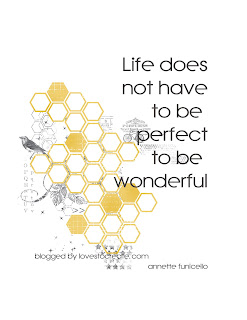
Here is a little wall art I created last night inside of ten minutes, the colors match our bedroom perfectly so going to do a little decorating with it!  Creating with her designs doesn't have to get overly complicated as you can see below at the two versions I created.  Sometimes just a simple art piece to dress up your walls is all you need!  And how cool is it that you can create it in the comfort of your own home! 


Excuse the poor cell phone photo.

I used one of my favorite quotes and a piece from this KIT to create the pieces above. Click on photos to see them in a larger size.

 If you aren't sure how to use her designs then check back with me monthly as I share what I create.  You will also be able to find more inspiration from the rest of the CT members and on Rhonna's Blog HERE.

She will be continuing to add to the shop so check back often!

Have a great Thursday!

**I will be drawing names from comments left on Wednesdays post below and this one so you don't have to comment on both, just one is good. Thanks! ***